fbpx

Activate

How do I activate the plugin?

If you already have the plugin installed on your WordPress site, you can skip to #5. If you don’t have it already, we recommend upgrading to our cloud app for advanced brute force protection and site performance optimization. 

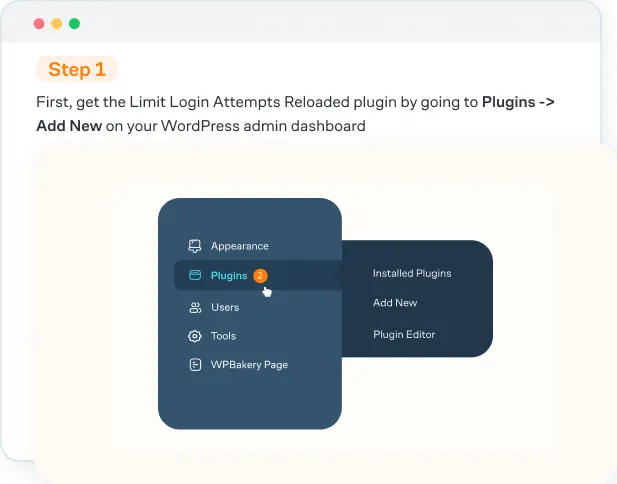
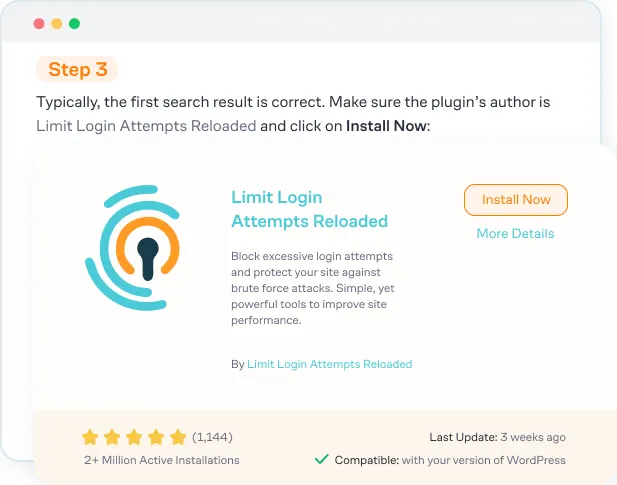
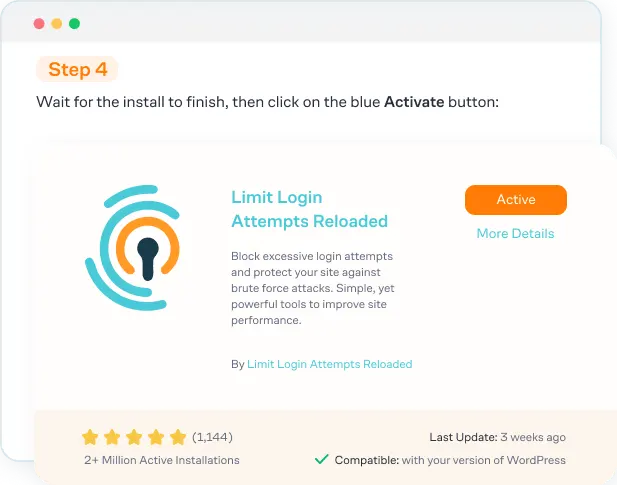
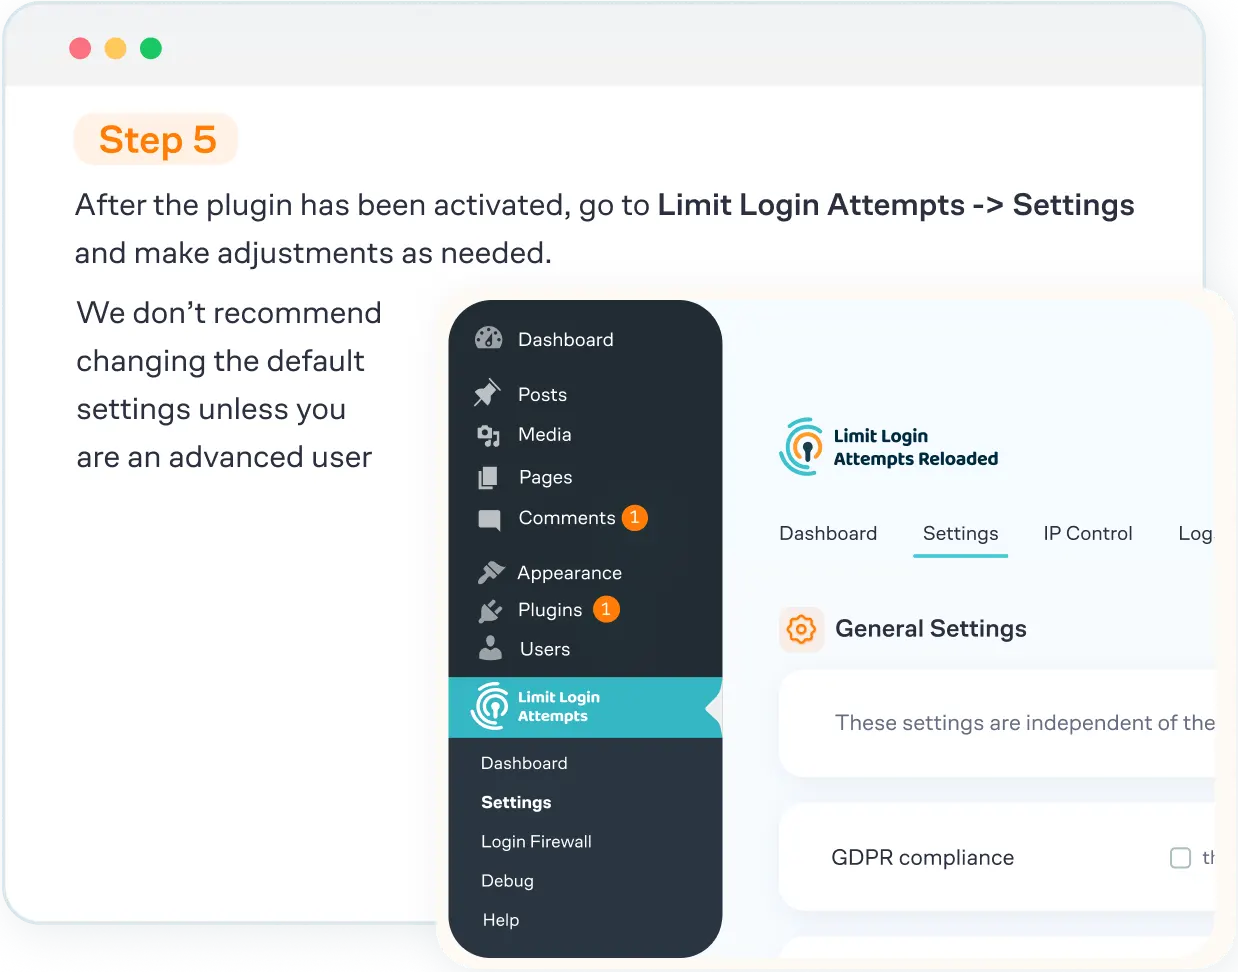
You can activate Limit Login Attempts Reloaded in your WordPress dashboard by following these steps.
1. First, get the Limit Login Attempts Reloaded plugin by going to Plugins -> Add New on your WordPress admin dashboard.


2. Type in Limit Login Attempts Reloaded in the search box and hit enter/return:


3. Typically, the first search result is correct. Make sure the plugin’s author is Limit Login Attempts Reloaded and click on Install Now:

4.  Wait for the install to finish, then click on the blue Activate button:

5. After the plugin has been activated, go to Limit Login Attempts -> Settings and make adjustments as needed. We don’t recommend changing the default settings unless you are an advanced user.
6. If you decide to go with the premium cloud app, you’ll receive an email with setup instructions shortly after your subscription is completed. This includes a Setup Code that you’ll enter into the Limit Login Attempts Reloaded Cloud App area in the plugin settings.

7. If you’d like to add additional domains to your network, you’ll use the same setup code from your first domain and replicate the process. You’ll receive an email from us each time this is done to approve the subscription.
If you’d like to re-enter your Setup Code, click the Edit link next to it:

Need Expert Assistance?

Upgrade to Limit Login Attempts Reloaded Premium and get exclusive access to our technical team as one of the many benefits. Our top WordPress experts will help with a range of issues from installation, troubleshooting, and configuration.